Food Styling Tips for Full Food Product Photos
Food Styling Tips for Full Food Product Photos. In this article; How do you photograph food products? What are the rules for food styling? How food is made to look good in photos? What is the difference between food styling and food photography? Let’s find out all the curiosities together…
Food Styling Tips for Full Food Product Photos
Without us realizing it, a lot of effort and time is spent on creating an end product that actually makes you want to take the food in the picture until you hear the term “food style” and see the attractive and delicious food images in the photo. Not only photos of nature or objects but also photos of food products need to be made attractive and look mouthwatering, with a food stylist the food will look more attractive, the colors are good, it doesn’t look wilted or overcooked.
Let’s take a peek at the next Food Photography series which discusses basic food styling tips for food photos below discussed at Mezink Academy titled Food Photography 101: Food Styling with Krystelia (Professional Food Stylist).
What is Food Styling in Food Photography?
Food styling is the art of preparing food in such a way that it looks attractive and stays fresh for a long time in front of the camera. To shoot photos of food products for use in print, video, digital, magazines, product launches, coffee table books, restaurant menus, and advertising campaigns, it needs to be prepared and shown in a beautiful way.
Food Styling Tips for Food Product Photos
Make sure Food and Ingredients are Fresh Before Photographing
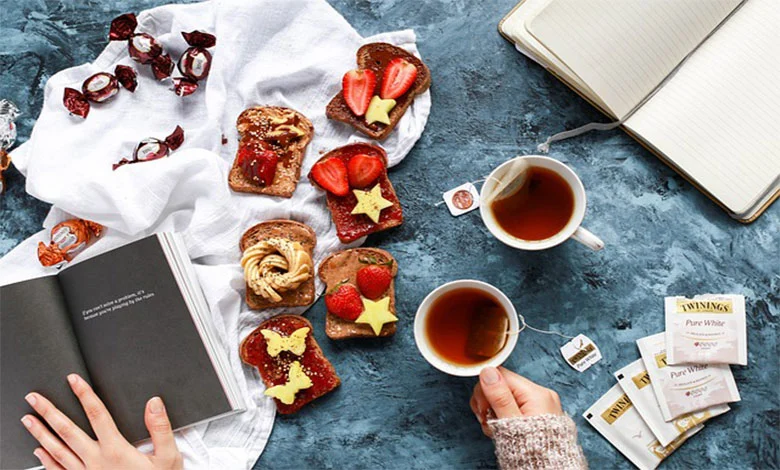
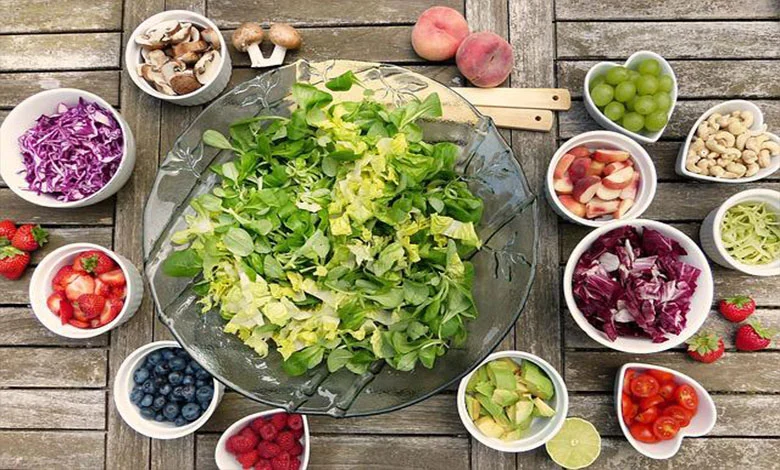
Fresh ingredients can actually be used as props in food product photos and placed directly in the background. They will bring an element of freshness to your images and create the feeling that the food has just been prepared. They will also give viewers hints of taste and flavor and help them imagine what the dish tastes like.
Pay Attention to Color Mix and Selection

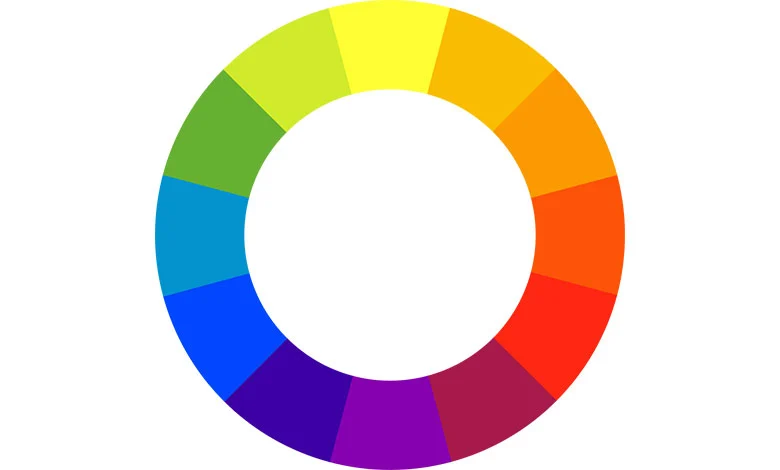
Each color has and evokes different feelings and moods. Therefore, it is very important to understand how the colors we use in our photos help the audience relate to the narrative we are expressing (which btw, is the whole purpose of composition). You can use color theory as a visual design element to add interest to your food product photos. This is especially important in food photography because the colors of our food and recipes tell us a lot about how the food will taste and influence our decision to make a recipe.
There are several ways that color theory can be applied to food product photos. To achieve this, you can simply use colors that are on opposite sides of the Color Wheel to produce color contrast in your image.
Choose the Right Angle
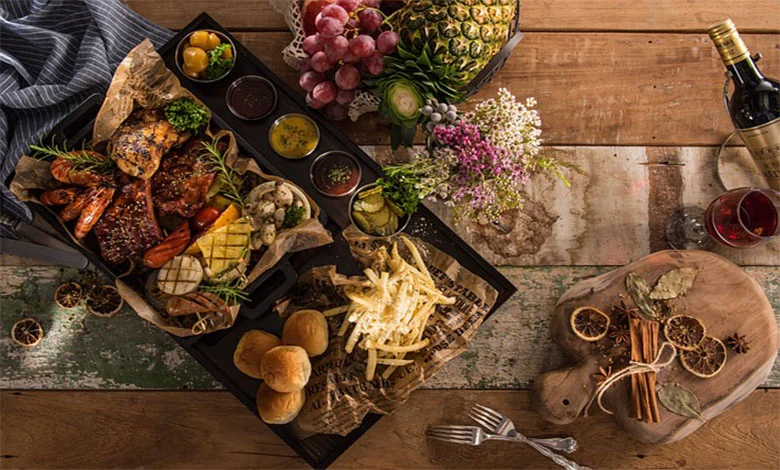
Pizza and hamburgers won’t be photographed from the same angle. A shot of a burger taken from above is unflattering, and unless your pizza has a lot of toppings, a straight-on shot won’t cut it. When you are setting up your shot, consider what perspective or angle best accentuates your food product photo. The overhead or flat lay angle is one angle that is widely used. Flat lay is an artistically placed image of an object taken directly from above.
Pay attention to the composition of food product photos
1 Rule of Thirds
Rule of thirds is a food product photo composition technique that divides the photo into 9 squares; 3 across and 3 down. With this grid, you can use it to build an interesting composition. Rule of thirds helps create balance and intentionally draws the audience’s attention to certain points of a photo. To use the rule of thirds, the subject of the photo should be placed along a fictitious vertical and/or horizontal line, or in between (often referred to as the “sweet spot”).
2 Rule of Odds
According to the rule of odds, an odd number of subjects instead of an even number will result in a more interesting and visually appealing composition when including a group of subjects in your photo. This is a rule that is probably often used in food product photos because we often envision a collection of items, such as cupcakes, pieces of fruit, multiple bowls of spaghetti, or whatever.
Your brain naturally organizes topics into pairs when the frame has an even number of subjects, such as two or four. This can make your composition appear a bit flat. Your eye will naturally gravitate towards the central subject when you use the law of odds to position one main subject in the frame with two other supporting subjects, giving your image a focal point.
Use Various Attractive Props
As in any other job, you will always need a few tools in your toolkit if you are a food product photo stylist. What should not be overlooked on a photo shoot are the following:
1 Wooden Photo Board
Wooden photo boards have undoubtedly become one of my favorite photography-related purchases. The stunning backdrop makes a tremendous difference when taking shots.
2 Knife
A pair of knives serves as a side element or subject, and because of their shape, they are ideal for implying movement and directing the audience’s eyes throughout the scene.
3 Cutting board
No matter whether you choose a rectangular, square, or round cutting board, it is advisable to have two types, one small and one large. Cutting boards are great for framing ingredients in process photos and can also serve as serving plates.
4 Napkins
When you need to add movement or fill space without detracting from the view, napkins are ideal. While the color you choose is not important, always adhere to the guidelines below to ensure they photograph well:
Simple motifs
Keep it simple from choosing neat motifs. For example, attracting the audience’s attention from flowing polka dots implies a strange impression. Therefore, minimalist stripes from the public can consider simple neutral motifs.
Use neutral colors
If the public is not close to the hue, use neutral colors such as white, gray, smoky blue, or brown. Avoid using stark white as flowing reflects all the light in the photo making it look like a strobe from public.
Kapa or linen-based
The usefulness of a napkin depends on what is island in it. Both cotton and linen are elastic materials that easily follow contours. Save alive public millet stiffness free pressed from those that are too starchy.
5 Cutlery set
There are tons of cutlery accessory. Remember to choose weathered, matte, or lacquered metal finished props to avoid reflections.
6 Bowls, plates, and glasses
When food is served in mounds as opposed to millet a few carefully selected pieces, it just looks better. Small bowls instead of regular sized dinner plates as they flowing look very out of place instead from use salad plates. In general, smaller plates are ideal for styling food product photos.
For drinks, every food product photo prop collection needs at least three glasses in different sizes, which are ideal for designing drinks or even layered serene desserts like panna mousses, mousses, and parfaits.